
Supplies used:
Glue Gun (every household should have one. Seriously, I think I bought this one for $1 years ago)
Ribbon ($1.99)
Scrapbook paper ($.59 each)
Frame from Goodwill ($2.49)
Wood Letter ($1.49)
Spray Paint and other paint (already had)
Clear Tape
Flower poof on a stick ($2.99)

The God-awful fugly frame from Goodwill (nothing a coat of paint won't fix though!)

Ribbon, scrapbook paper, and flower on a stick

I took the clear plastic piece out of the frame and layed it down on the paper. (the pages look misaligned b/c I lined up the fleur de lis' so they would be even). I will also point out here that the other tutorials I saw used fabric and staple guned the fabric to the back. I chose to use paper and tape. To each his own.


Voila! Here is what it looks like from the front side.

I then painted the frame and the wood letter J. I painted the frame the same color as the bottom half wall in their nursery. I then spray painted the letter J chocolate. Originally, I was going to do her monogram down the left hand side in pink. Then I remembered I had this wooden letter than I needed to use that I bought a while ago (I was going to use it somehow in the canvas project, but decided not to) Then, I wanted to paint the letter pink and use pink ribbon, (I bought both pink ribbon and chocolate). but I was out of pink spray paint, so I used brown instead. Not what I wished, but it turned out ok. Thats the fun thing about craftiness. You just kind of do it as you go!

Next I cut the ribbon into strips and placed them about 2.5 inches apart. I glue guned them together on the back, then also glue guned them to the plastic, so they wouldn't move around on me.

Voila! the front again.
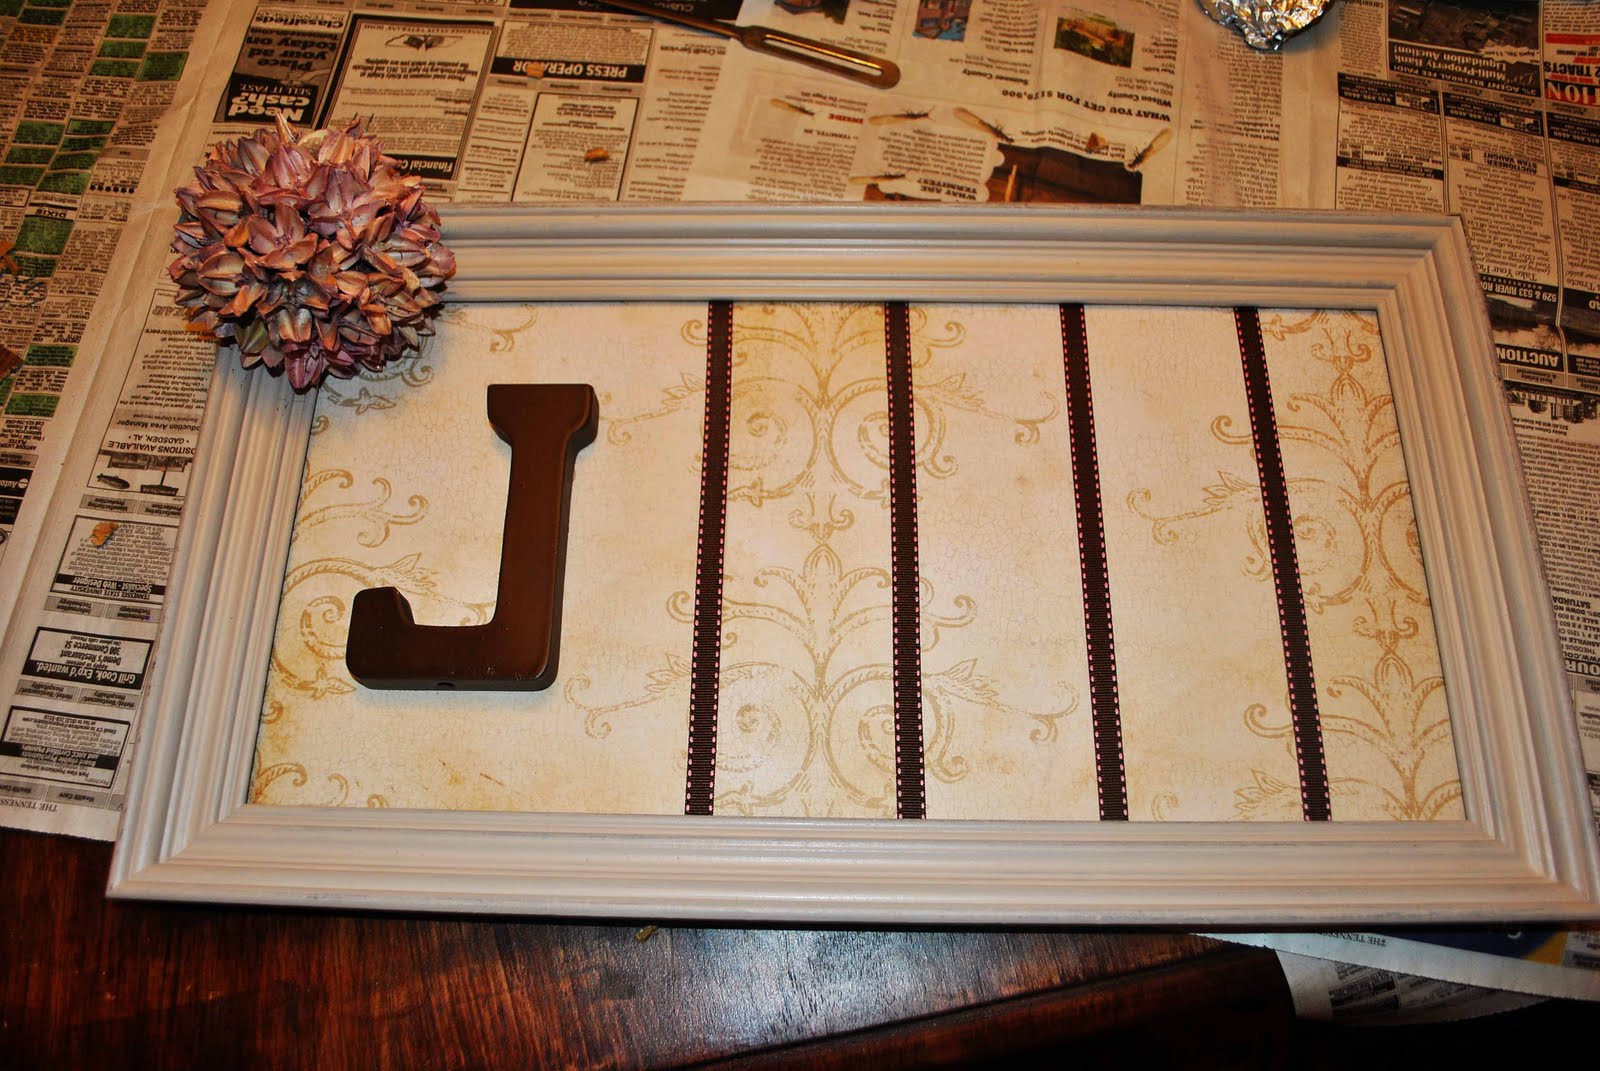
Final steps! I took the wooden stick off the poof flower and glue guned it to the upper corner. Then I glue guned the letter down onto the paper. Then put it all in the frame.

Close up of the letter and the ribbon. Its chocolate with pink border.
 |
| Finished product with bows included! She actually has more bows than that, but that is all I could grab quietly (they were already down for the night when I started this project) You can sqish as many on there as you can. They just clip to the ribbon. |

Isn't it the cutest ever?? I love how it turned out. I will probably hang it on the wall as is, or I might hang it from her door with a ribbon. I dunno yet. Anyway, this took less than 2 hours, and was SUPER simple. And I love it way better than the ones I have seen online for sale!

Cute! Now Josh needs something for his hats? (ok selfishly Im hoping that is a project so I can see how in the world to do it! ;))....Im thinking I may need to go to michaels...
ReplyDeleteI love it! You're projects always turn out fantastic though. :)
ReplyDeleteThis is sooo adorable! Love the color scheme and the monogram! And I just love your sidebar pics of your babies at each month! Hope you will share your project with my Pink Hippo Party @ http://pinkapotamus.blogspot.com/2011/04/pink-hippo-party-24.html
ReplyDelete